This will be the first of two posts documenting the
construction of our chicken coop. We’ve been told over and over; start with
chickens to get used to animals on the farm. Chickens have a bunch of useful
qualities, like giving eggs and nitrogen rich fertilizer. They also make great
insect police to keep pests out of the garden. We won’t be eating our chickens,
and will not need to replace them regularly so we don’t need a rooster to
fertilize any of our eggs. These will just be our girls, our posse of breakfast
and nitrogen machines.
What do chickens need?
·
The most important thing to consider when
building your own coop: Safety. There are many predators (especially in the
Washington woods), who see your chickens as an easy dinner. Some of which you
don’t often think about like owls and hawks. Make sure that there are no gaps
or openings through which an animal can squeeze through, yes, even on the roof.
Also, there’s this thing they call “poultry netting,” it’s a wire that’s been
weaved into those little octagon shapes. A determined raccoon or weasel can stick
an arm through that netting so be aware that if you are going to use poultry
netting, you may need to double layer it at least around the bottom of the coop
and run.
·
The actual chicken ‘coop’ is an enclosed box,
room or space where the chickens can go at night to feel safe and be out of the
weather. Typically, the coop is just an area filled with straw and a roosting
bar, for the hens to hang out. Also within the coop are your nesting boxes. Hens
should only be using the nesting boxes to lay eggs…so you don’t need one for
every chicken. You actually only need between two and four boxes for up to ten
hens.
·
Your coop is ideally off the ground, to
discourage mouse or rat infestations and a small ladder should be installed so
the chickens can enter and exit comfortably. Additionally, the coop needs a
door so your hens are totally sheltered from wind, rain, predators and
frost.
·
Aside from the coop, you need a run. This is a
fenced outdoor area to let the hens out into during the day so they can
scratch, eat insects and soak up daylight. Chickens need a significant amount
of light to continue laying (something not everyone knows) and as winter
approaches they will lay less and less. A simple 40 watt light bulb can be hung
from the coop during the dark winter to encourage more eggs.
·
Inside your coop, you want to make sure your
hens have access to lots of fresh water, dry straw to lay in and feed.
There will be four of us hoping to eat from our little
flock, so we want about six hens to start with. Andy and I want to leave lots
of room to expand our poultry in the future and perhaps even get some ducks as
well, so we are building a larger coop and run.
 | |
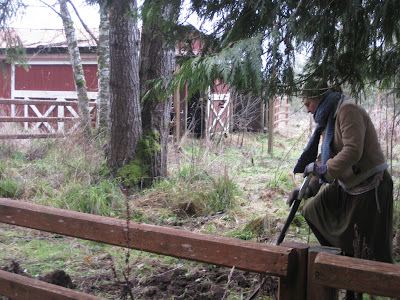
| Andy standing in the spot where we decided to build the coop. |
 |
| Digging and leveling... |
 |
| The previous landowner left a large pile of these railroad rocks. We will lay them down to level the coop site and help the coop drain should it get wet. |

 |
| Rocks down, time to get some wood. |
 | |||
| Sourced wood from Craigslist, nothing beats recycling! |
 |
| Andy, giving me a lesson with the skill saw... |
| We like Colors! |

 |
| Andy and I being dorks...lol |
 |
| Carried the first frame to the spot... |
First we designed our coop. It's simple, just a rectangle; but we wanted it tall enough to walk into. We decided on three doors: one to walk into the run, another to access the nesting boxes for eggs and another door to access a storage closet where we will put straw and feed. Additionally, the coop itself will need a chicken door that can open and shut to let them into the run every morning.
Other than designing and planning, the doing process has taken us about three full days: one to pick up wood, level the spot and lay rocks. It was really a full day and a 1/2 of cutting and painting. We're still in the middle of assembly now, we still have to build the coop-box. The days are short, so we try to work with as much sunlight as possible.


No comments:
Post a Comment